Custom Environments for JupyterHub
Info
Interactive code interpreters which are used by Jupyter notebooks are called kernels. Creating and using your own kernel has the benefit, that you can install your own preferred Python packages and use them in your notebooks.
In the following examples below, we use the name
"my-kernel" for our user kernel. We recommend prefixing your kernels
with keywords like alpha, barnard, romeo, venv, and conda.
This way, you can later recognize easier how and where you built the kernel,
which can be helpful in debugging, should you run into any issues.
Preliminary Steps
Start an interactive job
marie@login$ srun --pty --ntasks=1 --cpus-per-task=2 \
                  --mem-per-cpu=2541 --time=02:00:00 bash -l
When creating a virtual environment in your home directory, you got to decide to either use "Python virtualenv" or "conda environment".
Note
Please keep in mind that Python virtualenv is the preferred way to create a Python virtual environment. For working with conda virtual environments, it may be necessary to configure your shell as described in Python virtual environments
Python Virtualenv
While we have a general description on Python Virtual Environments, here we have a more detailed description on using them with JupyterHub:
Depending on the Cluster that you are targeting, please choose the right modules:
For use with Python version 3.10.4, please try to initialize your Python Virtual Environment like this:
marie@barnard$ module load release/24.04  GCCcore/11.3.0  Python/3.10.4
Modules GCCcore/11.3.0, Python/3.10.4 and 11 dependencies loaded.
For use with Python version 3.10.4, please try to initialize your Python Virtual Environment like this:
marie@barnard$ module load release/23.10  GCC/11.3.0  Python/3.10.4
Module GCC/11.3.0, Python/3.10.4 and 12 dependencies loaded.
Then continue with the steps below.
marie@barnard$ mkdir -p ~/usr/jlab-kernels # please use workspaces!
marie@barnard$ cd ~/usr/jlab-kernels
marie@barnard$ python3 -m venv --system-site-packages my-kernel
[...]
marie@barnard$ source my-kernel/bin/activate
[...]
(my-kernel) marie@barnard$ pip install ipykernel
Collecting ipykernel
[...]
Successfully installed [...] ipykernel-x.x.x ipython-x.x.x [...]
After following the initialization of the environment (above),
the usage of Python's Package manager pip is the same:
(my-kernel) marie@compute$ pip install --upgrade pip
(my-kernel) marie@compute$ python -m ipykernel install --user --name my-kernel --display-name="my kernel"
Installed kernelspec my-kernel in .../.local/share/jupyter/kernels/my-kernel
(my-kernel) marie@compute$ pip install [...] # now install additional packages for your notebooks
(my-kernel) marie@compute$ deactivate
Hint
If you use extra modules at your virtual environment please load them accordingly at Jupyter's Hub using the module load plugin located at the left sidebard.
Conda Environment
Load the needed module depending on Cluster architecture:
marie@compute$ module load Anaconda3
Hint
For working with conda virtual environments, it may be necessary to configure your shell as described in Python virtual environments.
Continue with environment creation, package installation and kernel registration:
marie@compute$ mkdir user-kernel # please use workspaces!
marie@compute$ conda create --prefix $HOME/user-kernel/my-kernel python=3.8.6
Collecting package metadata: done
Solving environment: done
[...]
marie@compute$ conda activate $HOME/user-kernel/my-kernel
marie@compute$ conda install ipykernel
Collecting package metadata: done
Solving environment: done
[...]
marie@compute$ python -m ipykernel install --user --name my-kernel --display-name="my kernel"
Installed kernelspec my-kernel in [...]
marie@compute$ conda install [..] # now install additional packages for your notebooks
marie@compute$ conda deactivate
Using your custom environment
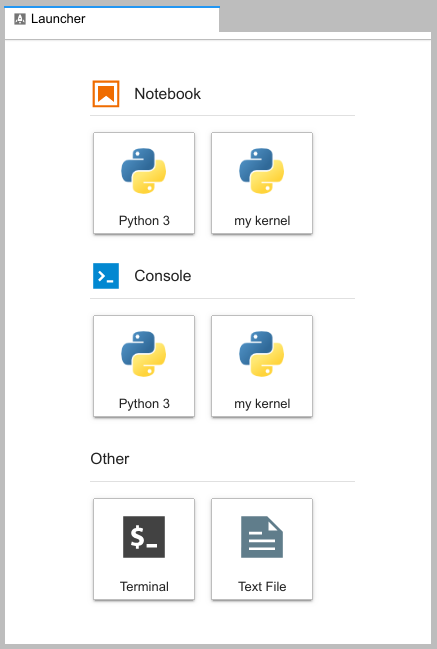
Now you can start a new session and your kernel should be available.
Your kernels are listed on the launcher page:
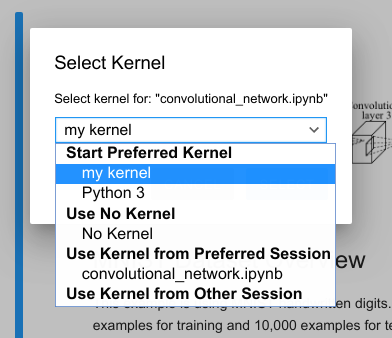
You can switch kernels of existing notebooks in the menu:
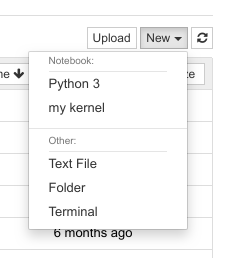
Your kernel is listed in the New menu:
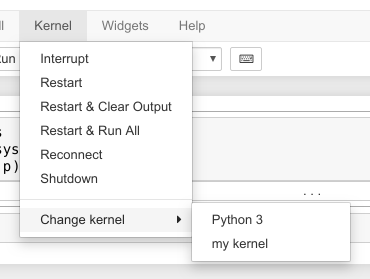
You can switch kernels of existing notebooks in the kernel menu:
Note
Both python venv and conda virtual environments will be mentioned in the same list.
Backlinks
The following pages link to this page: