Contribute via Browser
In the following, it is outlined how to contribute to the HPC documentation of TU Dresden/ZIH by means of GitLab's web interface using a standard web browser only.
Preparation
First of all, you need an account on gitlab.hrz.tu-chemnitz.de. Secondly, you need access to the project ZIH/hpcsupport/hpc-compendium.
The project is publicly visible, i.e., it is open to the world and any signed-in user has the Guest role on this repository. Guests have only very limited permissions. In particular, as guest, you can contribute to the documentation by creating issues, but you cannot edit files and create new branches.
To be granted the role Developer, please request access by clicking the corresponding button.
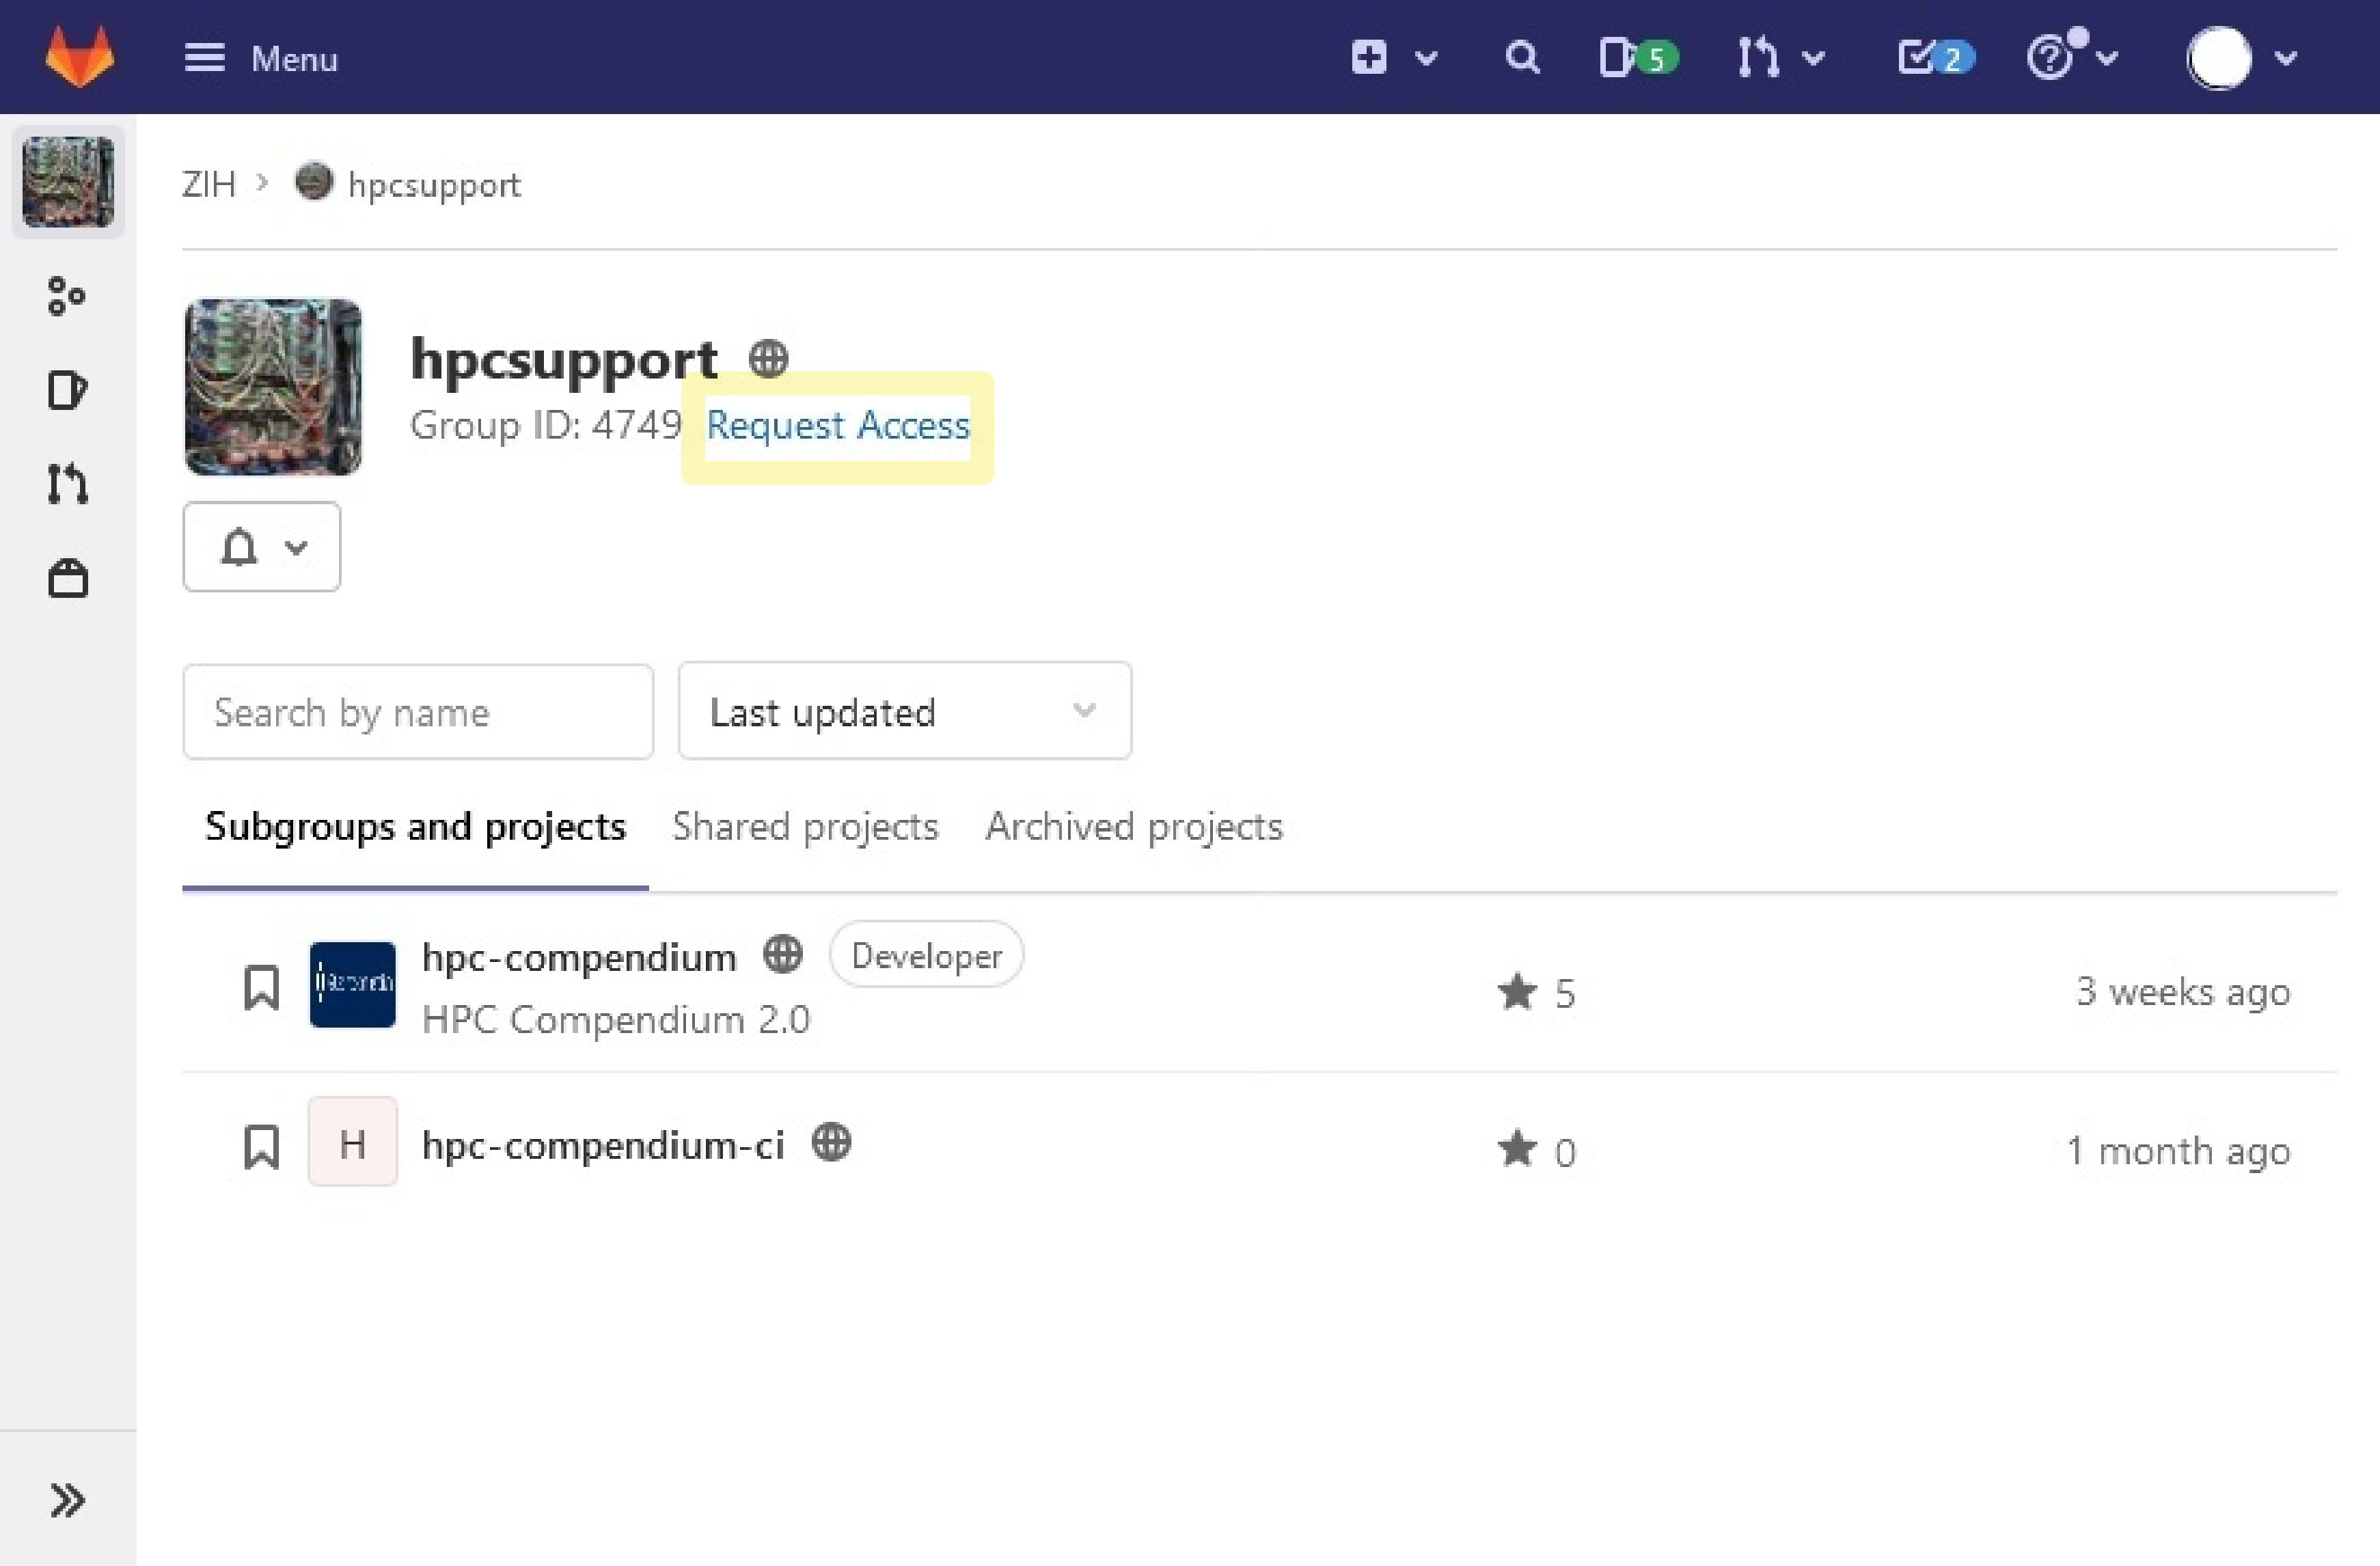
Once you are granted the developer role, choose "ZIH/hpcsupport/hpc-compendium" in your project list.
Git basics
If you are not familiar with the basics of Git-based document revision control yet, please have a look at GitLab tutorials.
Create a Branch
Your contribution starts by creating your own branch of the repository that will hold your edits and additions. Create your branch by clicking on "+" near "preview->hpc-compendium/" as depicted in the figure and click "New branch".
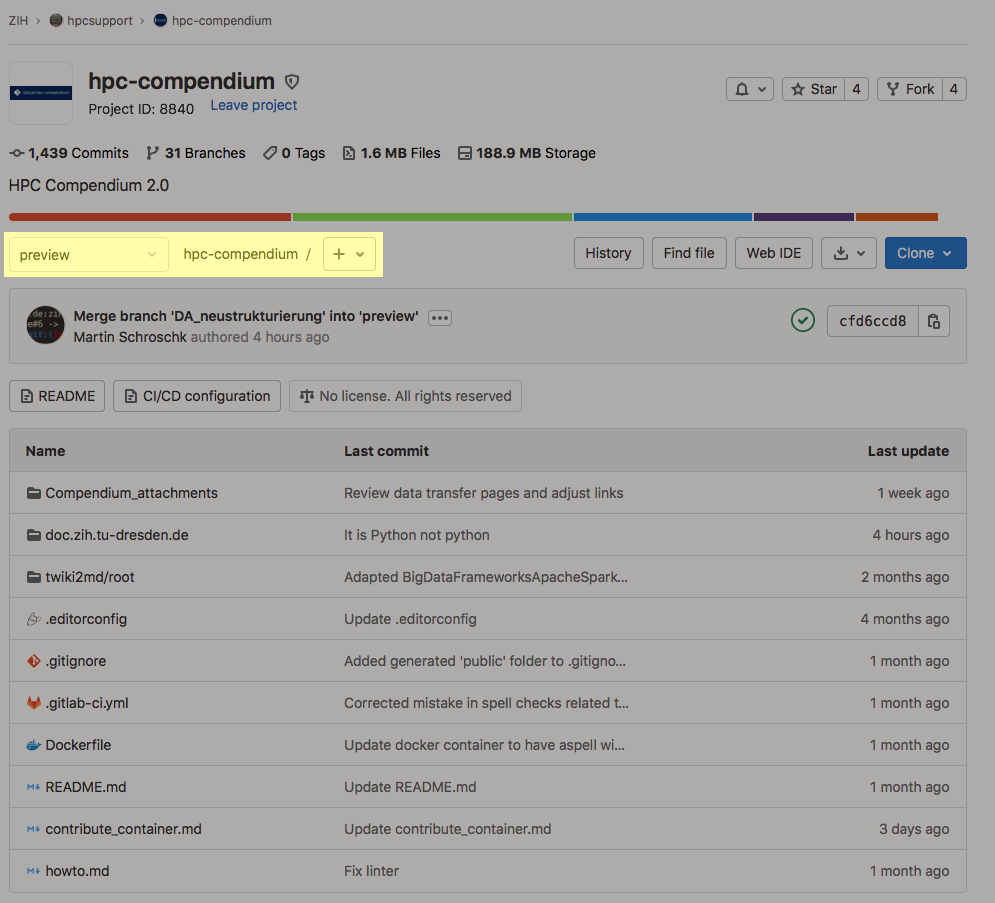
By default, the new branch should be created from the preview branch, as pre-selected.
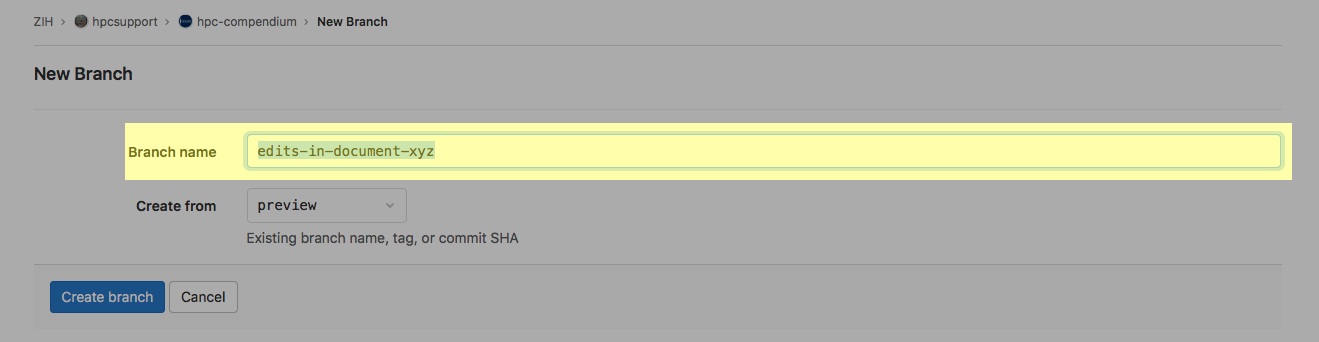
Define a branch name that briefly describes what you plan to change, e.g., edits-in-document-xyz.
Then, click on "Create branch" as depicted in this figure:
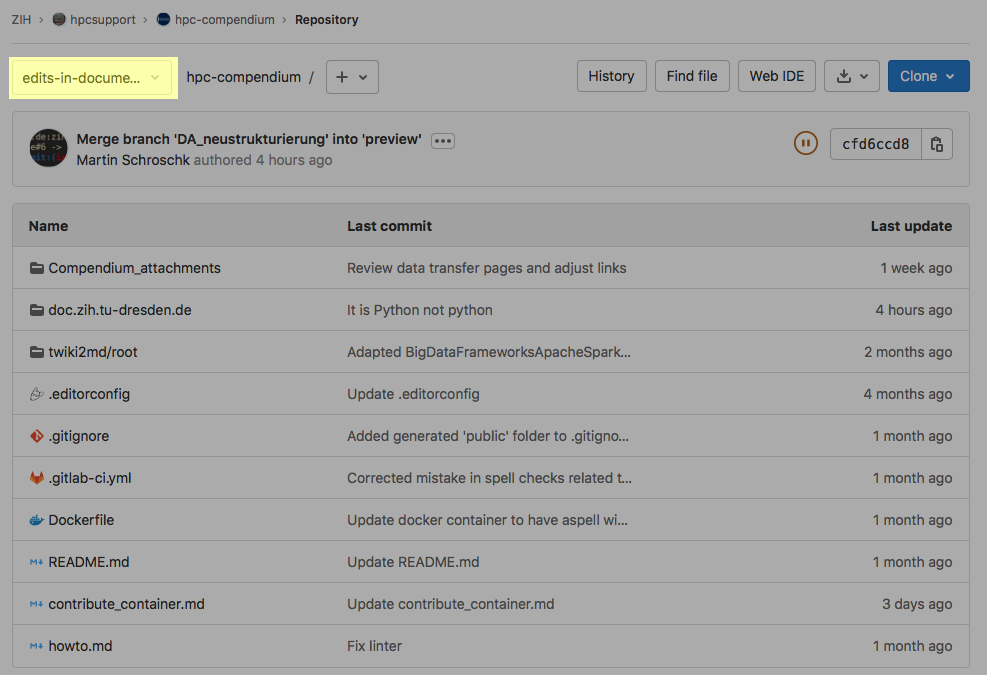
As a result, you should now see your branch's name on top of your list of repository files as depicted here:
Editing Existing Articles
Navigate the depicted document hierarchy under doc.zih.tu-dresden.de/docs until you find the
article to be edited. A click on the article's name opens a textual representation of the article.
In the top right corner of it, you find the button "Edit" to be clicked in order to make changes.
Once you completed your changes, click on "Commit changes". Please add meaningful comment about the
changes you made under "Commit message". Feel free to do as many changes and commits as you wish in
your branch of the repository.
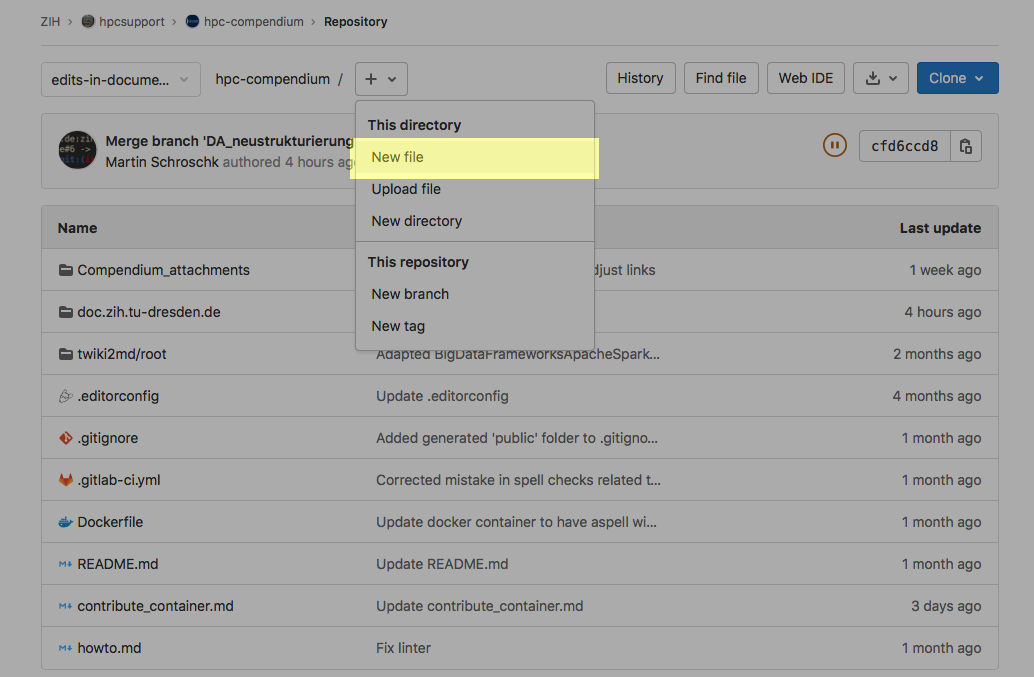
Adding New Article
Navigate the depicted document hierarchy under doc.zih.tu-dresden.de/docs to find a topic that
fits best to your article. To start a completely new article, click on "+ New file" as depicted
here:
Set a file name that corresponds well to your article like application_xyz.md.
(The file name should follow the pattern fancy_title_and_more.md.)
Once you completed your initial edits, click on "commit".

Finally, the new article needs to be added to the navigation section of the configuration file
doc.zih.tu-dresden.de/mkdocs.yaml.
Submitting Articles for Publication
Once you are satisfied with your edits, you are ready for publication.
Therefore, your edits need to undergo an internal review process and pass the CI/CD pipeline tests.
This process is triggered by creating a "merge request", which serves the purpose of merging your edits
into the preview branch of the repository.
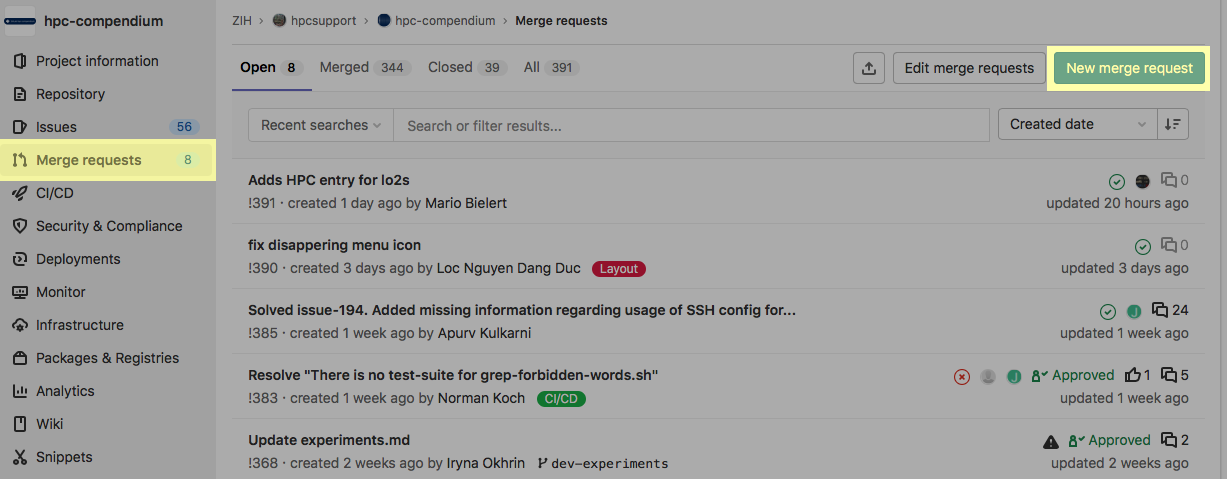
- Click on "Merge requests" (in the menu to the left) as depicted below.
- Then, click on the button "New merge request".
- Select your source branch (for example
edits-in-document-xyz) and click on "Compare branches and continue". (The target branch is alwayspreview. This is pre-selected - do not change!) - The next screen will give you an overview of your changes. Please provide a meaningful description of the contributions. Once you checked them, click on "Create merge request".
Revision of Articles
As stated earlier, all changes undergo a review process. This covers automated checks contained in the CI/CD pipeline and the review by a maintainer. This is to ensure the quality of all contributions, e. g. by checking our content rules. You can follow this process under Merge requests (where you initiated your merge request). If you are asked to make corrections or changes, follow the directions as indicated. Once your merge request has been accepted, the merge request will be closed and the branch will be deleted. At this point, there is nothing else to do for you. Except probably for waiting a little while until your changes become visible on the official web site.
Backlinks
The following pages link to this page: